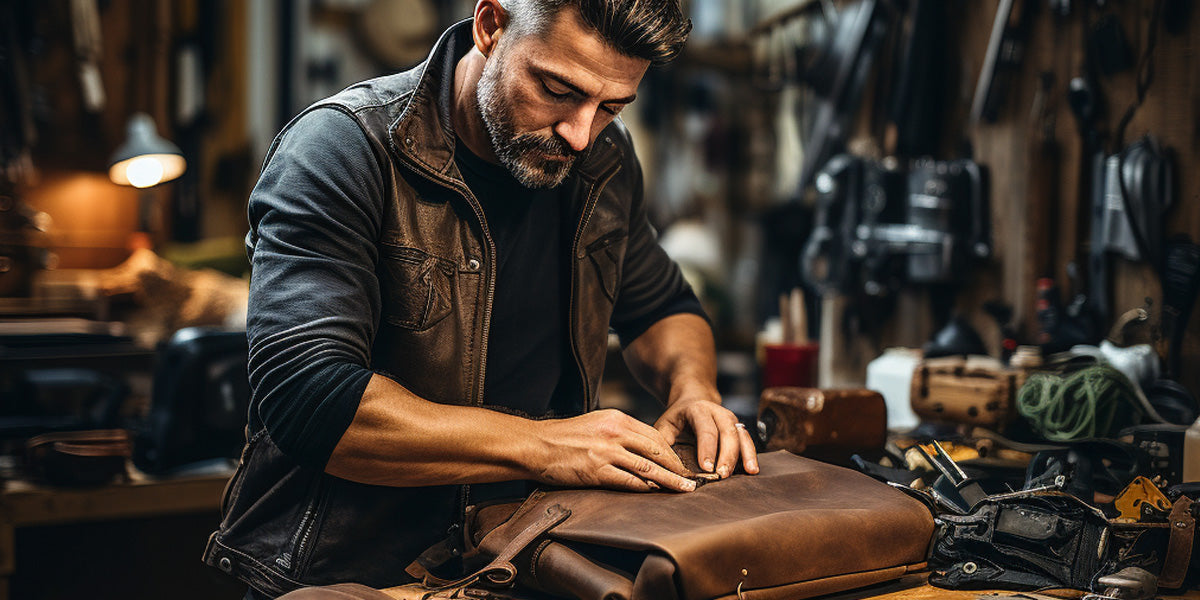
To repair leather bag, clean the area and apply a leather repair kit. Use a conditioner to restore its shine.
Leather bags are prized for their durability and elegance. Over time, they can experience wear and tear, such as scratches, scuffs, or even small tears. Proper maintenance and timely repair can extend the life of your bag. A leather repair kit is essential for fixing minor damages and maintaining the bag’s appearance.
Cleaning the affected area first ensures the repair materials adhere properly. Conditioning the leather post-repair helps in preserving its natural luster and suppleness. Regular upkeep not only keeps the bag looking new but also enhances its longevity. With a few simple steps, you can keep your leather bag in top shape for years.
Common Leather Issues
Leather bags are stylish and durable. But, they can get damaged over time. Common issues include scratches, scuffs, tears, and holes. Knowing how to fix these problems can save your bag. It also keeps it looking new for longer.
Scratches and Scuffs
Scratches and scuffs are common on leather bags. They can make your bag look old and worn out. Luckily, they are easy to fix. To fix light scratches, rub them gently with your finger. The natural oils in your skin can help. For deeper scratches, you might need a leather conditioner. Apply a small amount of conditioner to a soft cloth. Rub it on the scratch in a circular motion. Let it sit for a few minutes, then buff it with a clean cloth.
Another method involves using olive oil or baby oil. Dab a small amount on a cotton ball. Rub it on the scratch gently. This can help to blend the scratch with the rest of the leather. For scuffs, use a pencil eraser. Rub the eraser on the scuff mark until it disappears. Always test these methods on a small, hidden area first.
Tears and Holes
Tears and holes are more serious than scratches. They need a bit more work to fix. Small tears can be fixed with leather glue. Clean the area around the tear. Apply the glue to the edges of the tear. Press the edges together and hold them until the glue dries. For larger tears or holes, you might need a leather patch. Cut a piece of leather that matches your bag. Glue the patch to the inside of the bag, covering the tear or hole.
Another option is to use a leather repair kit. These kits come with everything you need. They often include patches, glue, and colorants. Follow the instructions carefully. Proper stitching can also help fix tears. Use a needle and thread designed for leather. Stitch the edges of the tear together. This can make the repair stronger and more durable.

Cleaning Techniques
Repairing a leather bag involves several steps. Cleaning is the most crucial one. Proper cleaning keeps the leather soft and shiny. Follow the right techniques to ensure your bag looks new again.
Choosing The Right Cleaner
Always use a leather-specific cleaner. Regular cleaners can damage leather. Look for cleaners that are pH-balanced. These cleaners are gentle on leather.
Before applying any cleaner, read the label. It should say it is safe for leather. Some good options include:
- Leather Honey Cleaner
- Chamberlain’s Leather Milk
- Lexol Leather Cleaner
Test the cleaner on a small area first. This ensures it does not discolor the leather. If the test spot looks good, proceed with cleaning the whole bag.
Cleaning Process
Start by removing surface dirt. Use a soft cloth or brush. Gently wipe or brush the leather. This step removes dust and loose dirt.
Next, apply the cleaner. Dampen a soft cloth with the cleaner. Do not soak the leather. Rub the cloth in a circular motion. Cover the entire surface evenly.
After cleaning, remove any excess cleaner. Use a dry, soft cloth for this step. Gently wipe the leather until it is dry. This prevents any residue from damaging the leather.
Let the bag air dry. Do not use heat. Heat can dry out and crack the leather. Place the bag in a cool, dry place.
Once dry, condition the leather. Conditioning keeps it soft and prevents cracks. Use a leather conditioner suitable for your bag.
Repair Methods
Leather bags are a stylish and durable accessory. But over time, they can get damaged. Learning how to repair a leather bag can save you money. This guide will show you simple repair methods to fix your favorite bag.
Using Leather Glue
Leather glue can fix small tears and cracks. It is easy to use and works quickly. Here are the steps to use leather glue:
- Clean the damaged area with a damp cloth.
- Apply a small amount of leather glue to the tear.
- Press the edges together and hold for a few seconds.
- Let the glue dry for at least 24 hours.
For larger tears, you might need extra support. Place a small patch behind the tear before applying the glue. This will make the repair stronger. Always test the glue on a small hidden area first to ensure it doesn’t discolor the leather.
Sewing Techniques
Sometimes, glue is not enough. Sewing techniques can fix bigger tears or loose seams. You will need a leather needle and strong thread. Follow these steps to sew your leather bag:
- Thread the needle with strong, matching thread.
- Start at one end of the tear and make small stitches.
- Keep the stitches close together for strength.
- Tie a knot at the end to secure the thread.
For better results, use a stitching awl. This tool makes it easier to sew through thick leather. Practice on scrap leather first if you are new to sewing. This will help you get comfortable with the technique. Here is a simple table to compare leather glue and sewing:
| Repair Method | Best For | Tools Needed |
|---|---|---|
| Leather Glue | Small Tears | Glue, Cloth |
| Sewing | Large Tears | Needle, Thread, Awl |
Maintenance Tips
Leather bags are stylish and durable, but they need proper care. Regular maintenance can extend the life of your leather bag. Simple tips can help you keep your bag looking new. This blog post will cover essential maintenance tips.
Conditioning Leather
Leather needs conditioning to stay soft and flexible. Regular conditioning helps prevent cracks and dryness. Follow these steps to condition your leather bag:
- Choose a quality leather conditioner. Avoid products with alcohol.
- Clean the bag first. Use a damp cloth to remove dirt and dust.
- Apply a small amount of conditioner. Use a soft cloth to rub it in gently.
- Let the conditioner soak in. Leave the bag for a few hours or overnight.
- Buff the leather. Use a dry cloth to polish the bag.
Conditioning should be done every few months. This keeps the leather supple and looking good. Over-conditioning can harm the leather. Always follow the product instructions carefully.
Storage Best Practices
Proper storage is crucial for maintaining your leather bag. Follow these storage tips to keep your bag in top shape:
- Keep the bag in a cool, dry place. Avoid direct sunlight.
- Stuff the bag with paper. This helps maintain its shape.
- Use a dust bag. Store the leather bag in a soft cloth bag.
- Avoid plastic bags. They can trap moisture and cause mold.
- Keep away from sharp objects. Prevent scratches and damage.
Regularly check your stored bags for signs of wear. Proper storage can extend the life of your leather bag. Taking these steps ensures your bag stays beautiful for years.

Frequently Asked Questions
How Can I Clean A Leather Bag?
To clean a leather bag, use a damp cloth. Gently wipe the surface to remove dirt. Avoid using harsh chemicals. Let it air dry.
What Should I Use To Condition Leather?
Use a leather conditioner specifically designed for leather goods. Apply a small amount with a soft cloth. Buff gently for best results.
Can I Repair Scratches On Leather Bags?
Yes, you can repair minor scratches. Use a leather repair kit or natural oils like olive oil. Apply gently and buff.
How To Remove Stains From Leather Bags?
For stains, use a mixture of mild soap and water. Apply with a soft cloth. Gently rub the stained area. Wipe clean and air dry.
Conclusion
Reviving your leather bag is simpler than it seems. With patience and the right tools, you can achieve impressive results. Maintain its beauty by regularly cleaning and conditioning. Your leather bag will look fresh and last longer. Follow these steps, and your bag will serve you well for years.